Address
86 Amesbury Road
Manchester M9 6JF United Kingdom
Learn how to sharpen garden secateurs safely at home, remove sap and rust, protect the blade edge, and make cleaner cuts through every season with ease.
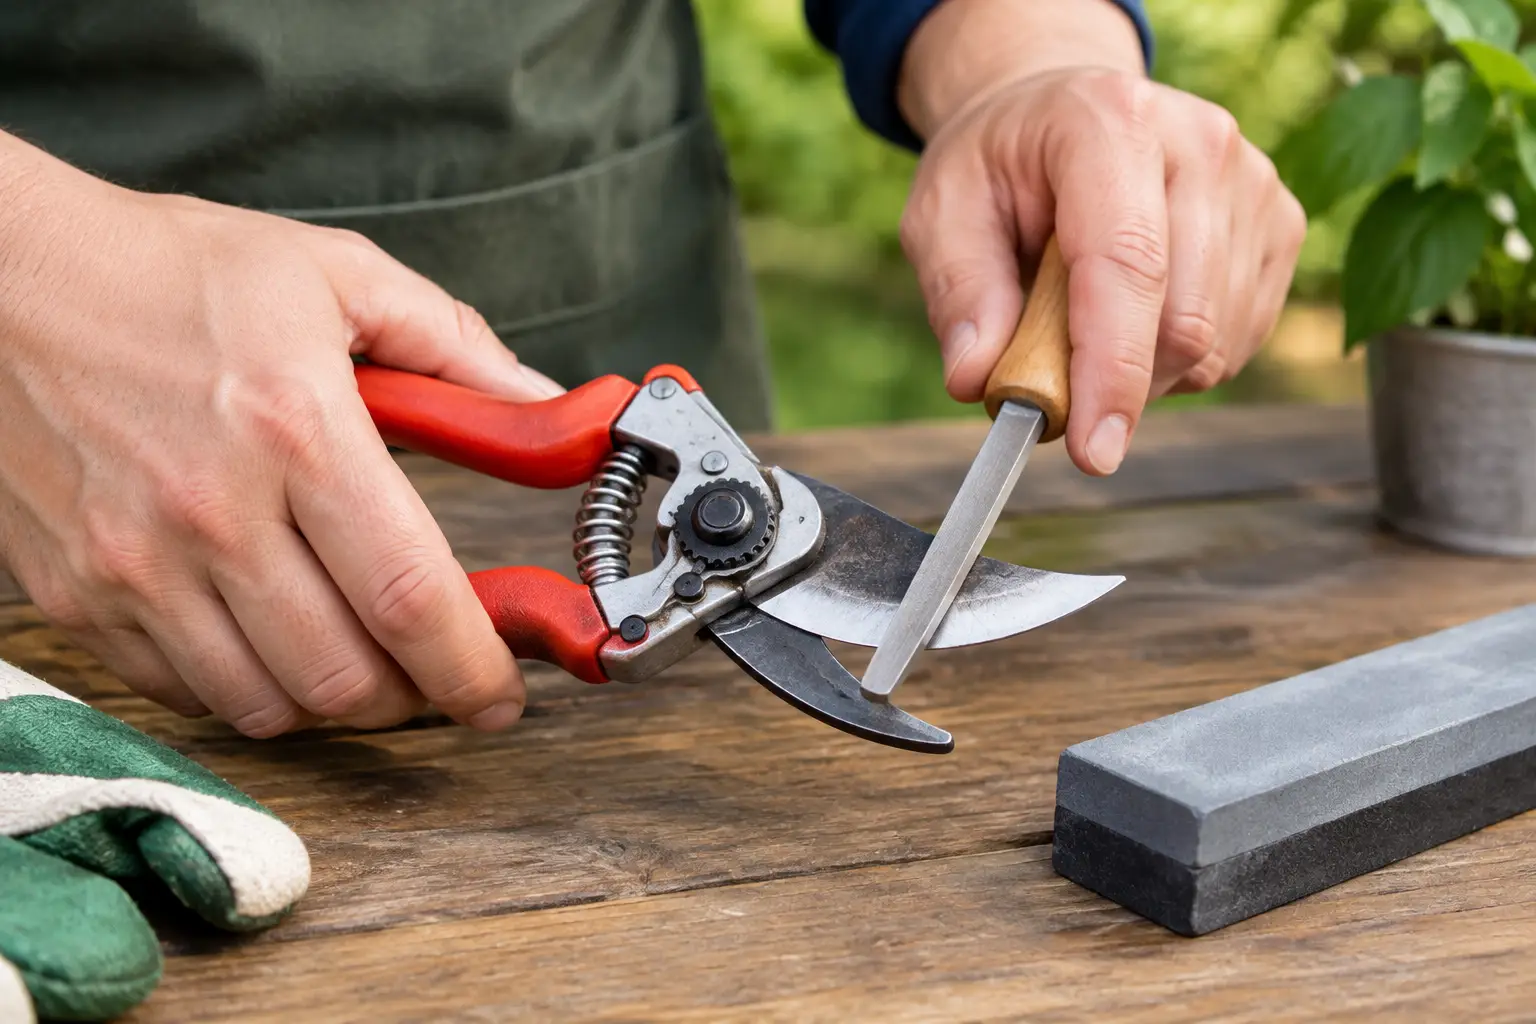
A pair of secateurs that crushes a rose stem rather than slicing it cleanly turns a two-minute garden job into a frustrating one. Learning how to sharpen garden secateurs is a handy bit of upkeep that helps plants heal faster, makes pruning easier on your hands and can save you replacing tools that still have plenty of life left.
You do not need a workshop full of equipment. A simple sharpening tool, a cloth and a little patience will usually do the job. The key is cleaning the blades first, sharpening the correct side and putting everything back together with the right tension.
Most household secateurs are bypass secateurs. Their curved blades pass closely alongside each other, much like scissors, and they are the best all-round choice for green stems, flowers and light pruning. One blade is usually sharp and bevelled, while the other is flatter. Only sharpen the bevelled cutting blade – filing the flat inner face changes the fit and stops the blades making a clean cut.
Anvil secateurs work differently. A sharp blade closes onto a flat metal or plastic block, known as the anvil. They are useful for dry, woody growth, but can bruise fresh stems. Sharpen the angled edge of the cutting blade only, following its existing bevel.
If your secateurs have chipped blades, a loose handle, a cracked anvil or blades that no longer meet even after adjustment, sharpening may not solve the problem. Replacement can be the more sensible option, particularly for lightweight budget tools. For everyday pruning, though, a clean and correctly sharpened pair is often all that is needed.
Gather a stiff brush or old toothbrush, washing-up liquid, a cloth, a small sharpening stone or diamond file, and a little light machine oil. Fine steel wool can help with surface rust. Wear sturdy gardening gloves, as even a blunt blade can catch skin unexpectedly.
A diamond file is a convenient choice because it works quickly and does not need soaking or oiling. A whetstone gives a very smooth finish but takes a little more practice. A small, fine hand file will work in a pinch, but avoid coarse files: they remove too much metal and can leave a rough edge.
If the secateurs are especially grimy, keep a bowl of warm, soapy water nearby. Do not soak tools with wooden handles or springs for long periods, as moisture can encourage rust in awkward places.
Sap, soil and dried plant matter can make secateurs feel blunt when the edge itself is still in fair condition. Open the handles fully and brush away loose dirt around the pivot, spring and blades. Wash the metal parts with warm water and washing-up liquid, then dry them thoroughly.
For sticky sap, rub the blades with a cloth dampened with rubbing alcohol or a suitable household cleaner, taking care not to soak the handles. Light orange rust can be lifted with fine steel wool or a rust-removing pad. Work gently – the aim is to clean the metal, not scour away the blade.
Take a close look at the cutting edge once it is clean. Tiny flat spots, a dull shine along the edge and snagged cuts are normal signs that it needs sharpening. Deep nicks need more work and may be better dealt with by a tool-sharpening service if the secateurs are high quality.
First, open the secateurs and secure them if possible. You can hold them firmly in a gloved hand, but a vice with a protective cloth around the handle is safer and steadier. Keep the blade facing away from you throughout.
Find the original bevel on the sharp blade. This is the sloping outer edge that leads down to the cutting edge. Place your diamond file or stone flat against that bevel. You are not trying to create a new angle – simply follow the one already there, which is commonly around 20 to 30 degrees.
Using light, controlled strokes, move the sharpener from the base of the blade towards its tip. Follow the curve rather than working straight across it. Use one direction on each stroke instead of scrubbing back and forth. Five to ten strokes are often enough for a blade that has been maintained regularly.
Check the edge as you go. It should look even and feel sharper, but do not test it with your thumb. Instead, carefully slice a piece of paper or make a test cut on a soft green stem from garden waste. A good edge will cut cleanly without tearing.
As you sharpen, a tiny raised lip of metal, called a burr, may form on the flat inner side of the blade. Turn the secateurs over and make one or two very gentle, flat passes with the fine side of your stone to remove it. Do not angle the sharpener on this side. Keeping it flat preserves the close contact between the blades.
Repeat the process only if the test cut is still ragged. More pressure is not better here. A few precise strokes remove less metal and help your secateurs last for years.
Usually, no. Sharpening with the secateurs assembled is quicker and avoids losing small washers, springs or locking parts. It is ideal for routine maintenance.
Taking them apart can help when sap and grit have built up around the pivot, or when you need to deal with stubborn rust. Before removing the central nut or bolt, take a quick photo of the arrangement so reassembly is straightforward. Clean each part, sharpen the cutting blade, dry everything fully and apply a tiny drop of oil to the pivot before putting it back together.
A sharp blade still will not perform properly if the central pivot is too loose or too tight. With the secateurs open, gently move the handles side to side. Noticeable wobble means the pivot needs tightening. If the handles are stiff and the blades do not open freely, loosen it slightly.
Adjust the nut or bolt in small increments, then open and close the secateurs several times. The blades should pass each other neatly with no gap, while the handles should still move smoothly. Test on a slender stem. The cut should be clean rather than mashed, and the stem should not catch between the blades.
This small adjustment matters as much as sharpening. Loose blades can tear plant tissue, while over-tightened secateurs make your hand work harder than necessary.
Wipe away all filing dust, then add a small amount of light oil to the pivot, spring and metal blade surfaces. Open and close the handles a few times to distribute it, then wipe off any excess. Too much oil attracts dust and grit.
If you are pruning plants that may carry disease, clean the blades before moving to another plant. For routine garden use, washing and drying after use is a good habit. When cutting around known fungal or bacterial problems, disinfect the blades between plants according to the product instructions.
Store secateurs closed or locked, somewhere dry and out of reach of children. A shed is fine if it stays reasonably dry, but a damp corner will soon undo your hard work. A quick wipe and drop of oil before winter storage is one of those small jobs that makes spring gardening easier.
How often you sharpen depends on what you cut and how often you garden. Light deadheading and trimming soft stems may only call for a touch-up once or twice a season. Regular pruning of shrubs, woody stems or plants with gritty soil on them will blunt the blades sooner.
Avoid cutting wire, plastic ties, bamboo canes or branches thicker than your secateurs are designed to handle. Those jobs can chip the edge or strain the pivot. Use loppers for thicker branches and keep your secateurs for the neat, precise work they do best.
A few minutes of care after a pruning session is far easier than rescuing rusted, sticky tools next year. Keep the edge clean, make small sharpening touch-ups rather than waiting for it to go blunt, and your secateurs will be ready whenever the garden needs a tidy-up.
